A badge is a digital award earned by a user upon completing a course or a set of courses to showcase the skills and knowledge gained.
This feature allows a badge to be associated with a completed learning resource. These badges are similar to certificates of completion and are shown in the learning history screen for learners to access easily. The My Awards widget is also available to display a list of earned badges.
A badge is an image with ‘built-in’ information or metadata. A user can click on a badge, from either the history screen or My Awards widget, to download a portable digital image based on the Open Badge 2.0 specification. This specification permits a third party to verify that the badge is valid, possibly in support of allowing the badge holder to access a certain location or to perform a certain task.
The image file must be downloaded as .PNG file format.
You can associate multiple courses with a badge, but completing any one of them will earn the badge. You cannot set a badge to be earned by completing multiple courses.
If you use ComplianceWire, please note that a badge does NOT represent GxP qualification status.
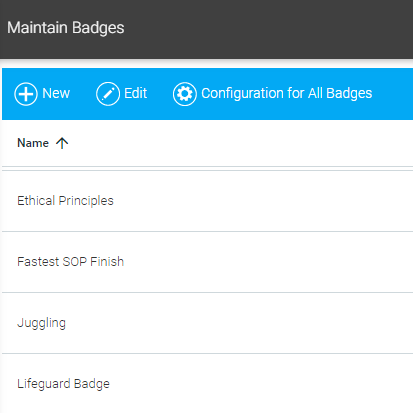
To create or update a badge for users, go to Tools > Maintain Badges in the Navigation Bar of the Administrator's Console.
The main screen is displayed with a list of all badges available for the company. Click the New button to create a new badge.
It is important to provide a good Name, Description, and Criteria necessary for a learner to earn the badge. This information will be visible when the badge is verified by a third party.
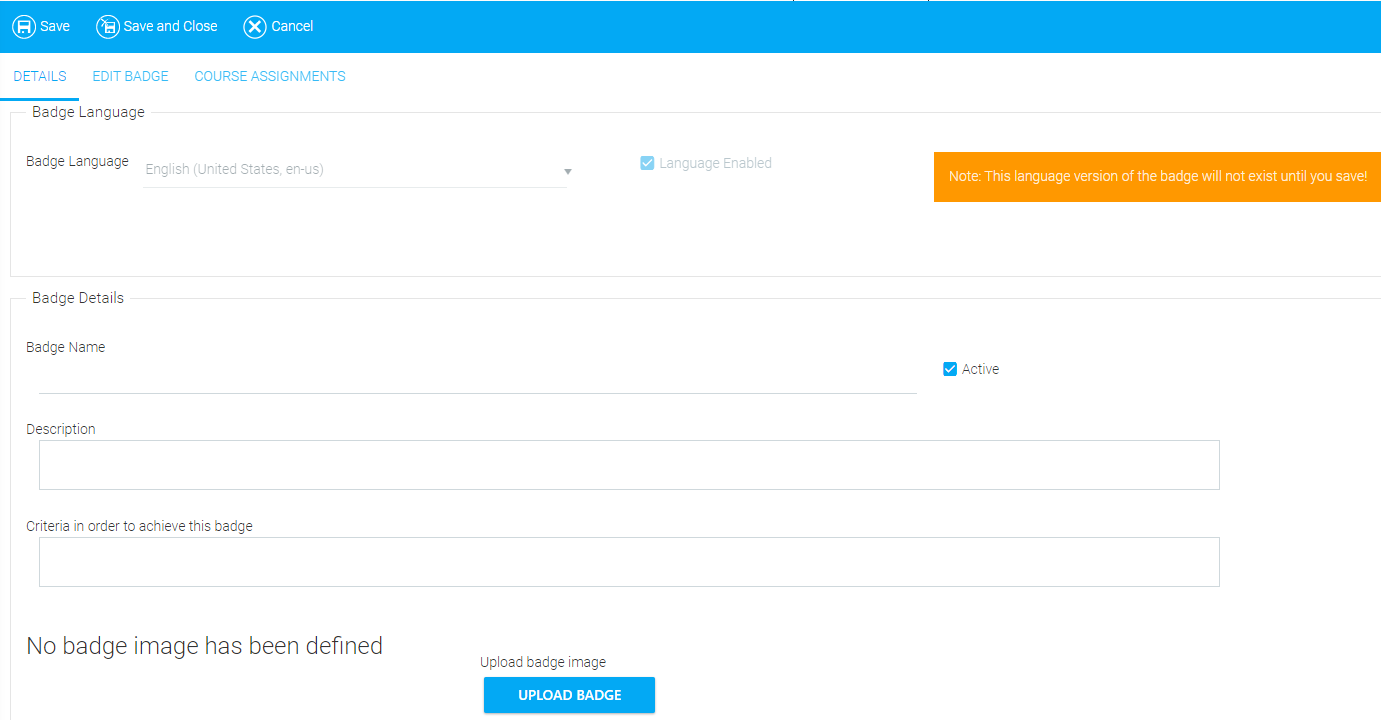
You can upload an existing image file by clicking the Upload Badge button on the Details tab.
Optionally, you can visit https://badge.design/ to create badge image files at no cost.
The accepted format for the image file being uploaded is “.PNG” with dimensions of at least is 400 x 400 pixels. The image must be square and the file must be 120 KB or less. The recommended image size is 32 KB.
After creating the badge, you can assign courses to it from the Course Assignments tab.
Select the course(s) that you'd like to associate with this badge. Use the search feature or scroll through the course list and click the checkbox next to the appropriate course title(s) to include. Then click the Select button.
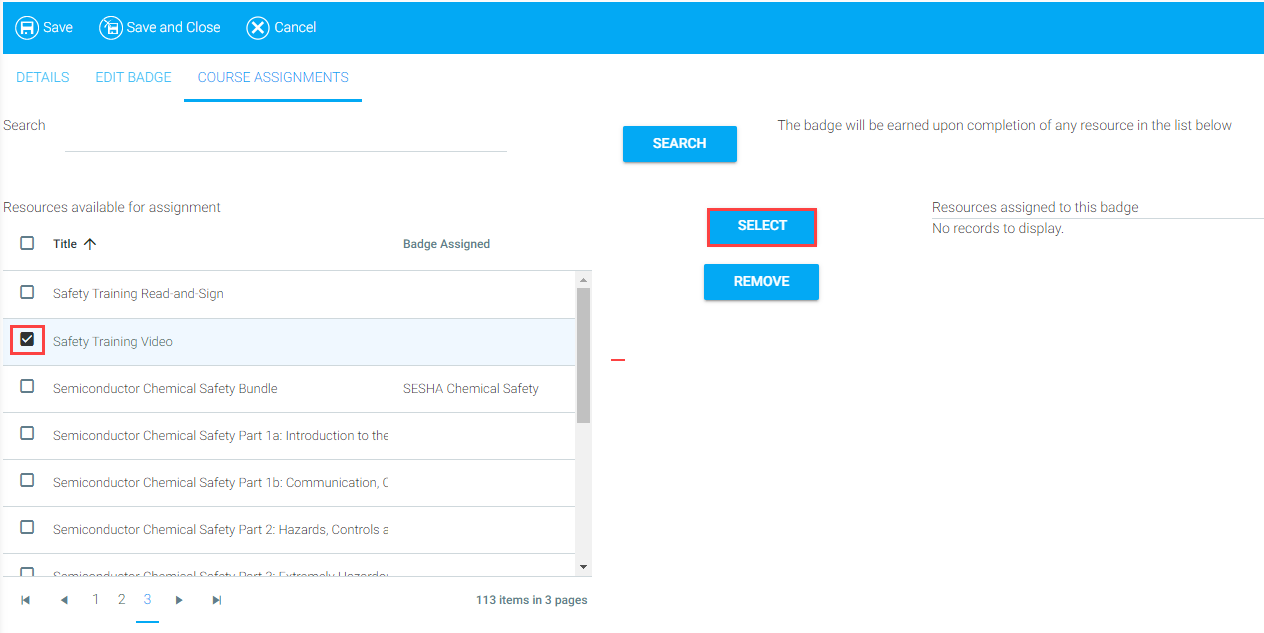
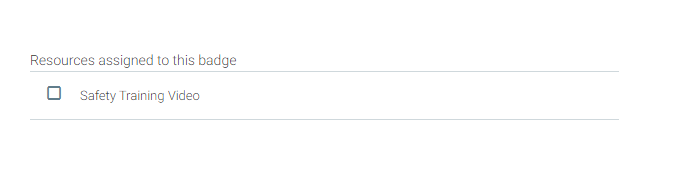
The selected courses will appear in the Resources Assigned to This Badge section.
Completion of any course that is associated with a badge, including past completions, will result in earning the badge. The badge will remain in effect as long as the learner has at least one non-expired completion for a course associated with the badge. Once the badge expires, it will no longer appear in the My Awards widget but will continue to appear in the History screen. When verifying the badge, the expiration date will appear even in advance of the expiration date.
To disassociate a course from a badge, select the course(s) from the Resources Assigned to This Badge section, and click Remove. This action will remove any earned badges that resulted from the completion of the particular course.
To award the badge only upon completion of multiple courses, create a certificate consisting of a list of courses and then associate the certificate with the badge. (Certificates are enrolled into and completed as a single entity.)
Click Save.
You can also assign a badge to a course from the Details tab when creating the learning resource.
Each course can be associated with only one badge. If a course is already associated with a badge, and then you associate that course with a second badge, the course will no longer be associated with the first badge, and learners who completed that course could lose the first badge.
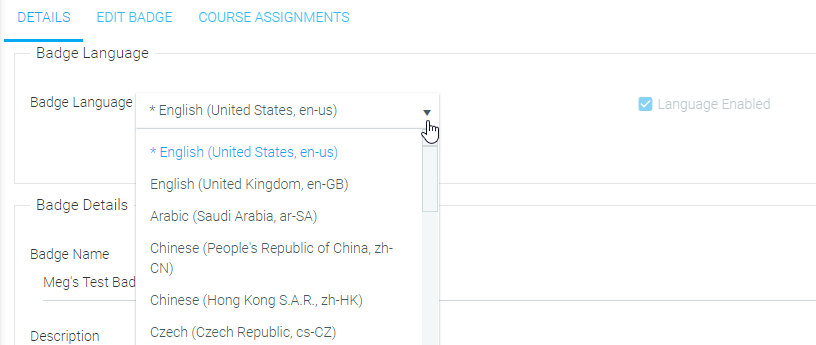
After saving the badge, you can select a language from the Badge Language drop-down on the Details tab. Enter the relevant translated text for the title and description.
To edit an existing badge, select a badge from the list in the main screen and then click Edit.
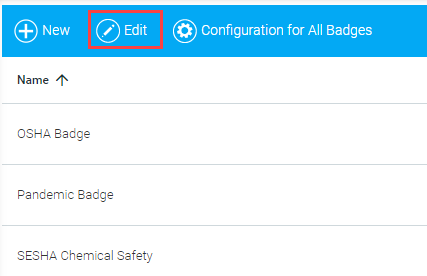
You can update the name, description, and criteria. You can also add or remove assigned courses from the badge or upload a new badge image. Select Save to maintain your changes or Cancel to abandon them.
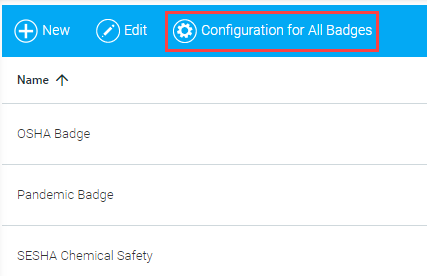
The badge configuration displays relevant information for a third party to verify badges issued by your company. Click the Configuration for All Badges button from the Maintain Badges screen.
Enter the relevant information as shown below:
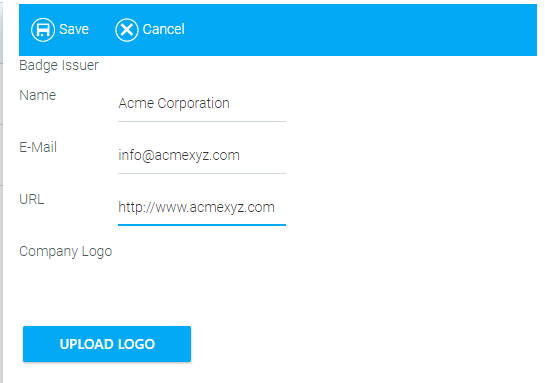
This configuration will apply to all badges created for your company.
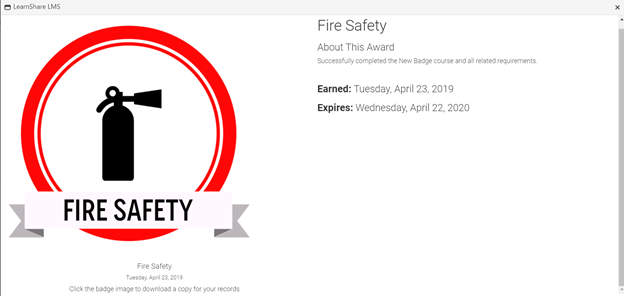
Learners can view their earned badges in the Learning History screen, in the same column where certificates of completion appear (usually located on the right side of the screen). The badge image will appear even after the completion of the associated course has expired.

Learners can click on the badge icon to view more details about the badge and download it.
Another way to allow learners to access badges is to add a My Awards List widget to a portal page. This widget can be placed on a home page or even occupy its own page. The widget will display any badges for which the completion of the associated course has not yet expired. As with the Learning History screen, this widget allows learners to click on a badge image to view more details about the badge and download it.