Creating a Certificate
How to Create the Enrollment Object
The Enrollment Object for the certificate is created the same as other resources.
1.Go to Resources >Maintain Learning Resources on the Admin Console.
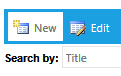
2.Select New from the top-hand toolbar.
3.Type the title of your certificate on the Overview tab.
- Remember this is the title that the Learner will see on their Development Plan.
- This resource is the certificate title or “enrollment object” for the certificate.
4.Change the Type of Resource from Learning Resource to Training Plan/ Certificate Program.

5.Select the Certificate Media Type.
6.If learners will need to complete this certificate multiple times, check the Allow Multiple enrollments box on the Overview tab. If this certificate is going to expire, it must allow Multiple Enrollments.
7.Check “Allow previous completions of resources to be included within this certificate” if previous completions of resources that are a part of the certificate can be counted towards completion of the certificate. If you do not check this box, then the learner will be required to complete all of the courses on the certificate (as part of the certificate), even if they have previously completed some of the individual resources.
- If you do not see this checkbox, double-check that the Type of Resource is set to Training Plan/ Certificate Program.

NOTE: A certificate cannot allow multiple enrollments and allow previous completions of resources to be included within the certificate. If you check Allow Multiple Enrollment, the allow previous completions check box will be disabled.
8.Complete the Description tab and other optional tabs the same as any other resource.
9.Go to the Audience Tab of the Enrollment Object to set the audience for the certificate.
NOTE: Detailed information about how to set up these requirements can be found in the online Help section under the topic Create or Edit a Learning Resource
How to Add Resources to the Certificate
Once the Enrollment Object has been created and saved, the certificate structure can be created. Follow these steps to create the certificate.
1. Select the Manage Certificate option in the top toolbar of the Resource

If you do not see the Manage Certificate option, double check that Training Plan/ Certificate Program is listed as the Type of Resource it displays on all tabs so they don’t need to go to Overview to set it.
2. A pop up window will appear asking you to confirm that you want to add resources to your certificate. Click OK.
3. The Adding Resources pop up screen should appear.
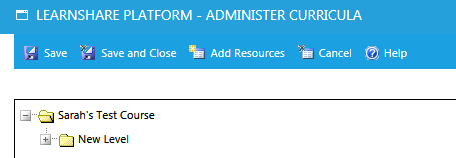
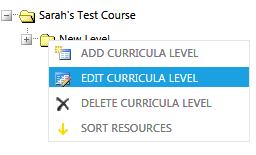
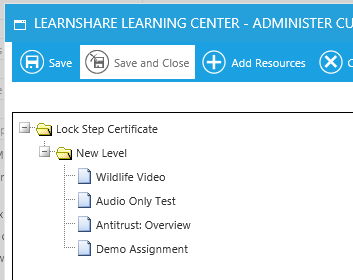
4. Right-click on the default "New Level" and select "Edit Curricula Level" to rename it.
5. Type in the name of the folder. Remember learners will see this name on their Development Plan.
6. Right-click on this folder and click Add Curricula level if you need to add additional levels. Once you have created each curricula level (folder), you are ready to add the resources.
7.Click the Add Resources button in the toolbar.
A pop-up window will appear:

8. Filter this list to find the selected resource(s).
- You can Search by:
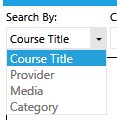
-
Or you can type a keyword in the text box:

9. Click the Go button. A list of resources will appear in the left panel.
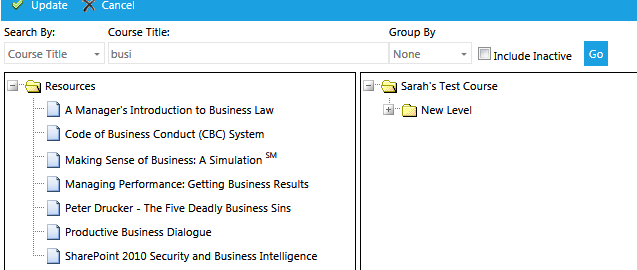
10.Drag and drop the resources you want from the list on the left, to the curriculum level on the right.
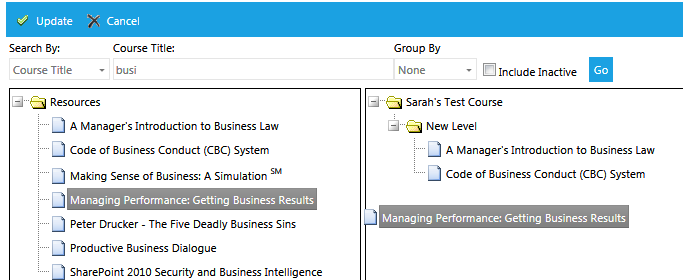
11.Click the Update button to save.
12.Click the Save and Close button to save all of your changes and return to the Maintain Learning Resources screen.
Advanced Certificate Rules
If your company is configured to use advanced certificate rules, then the following certificate options are available:
Required vs. Optional Resources - Resources will default to the Required status, as indicated by the red R on the resource icon. If desired, a resource can be optional within the certificate. To change the resource status, click on the resource title in the Administer Curricula window. The resource details will display on the right side of the screen.
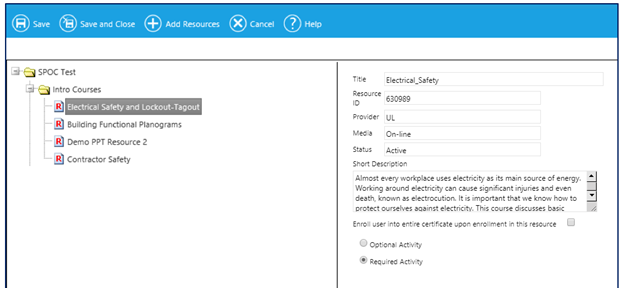
Select the radio button next to Optional Activity to change the status. The red R will disappear from the resource icon indicating that the requirement for this resource has been removed. Any section of a certificate can either contain required resources, optional resources or a mix of both.
Section Requirements for Optional Resources – Within any section of a certificate, you can indicate how many of the optional courses must be completed in order to complete the certificate. For example, if a section contains five optional resources, you might require the learner to complete any two of them. Or if no optional resources need to be completed, you can set this to zero.
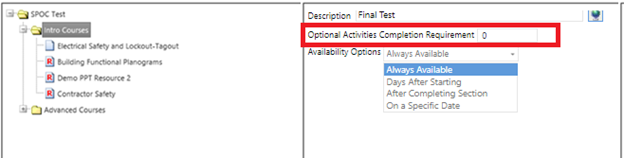
NOTE: When requiring the completion of any optional resources within a certificate section, consider naming that section in such a way as to convey the requirement to the learner. For example, “Advanced Courses - Complete All Required Courses and Any Two Optional Courses”
Resource Enrollment Options
Once the resources have been added to the certificate, you can set the resource enrollment options as needed. If a resource can only be completed as part of the certificate:
1.Click on the name of the Resource from the Add Resources screen.
The Resource overview will appear on the right-hand side of the screen.
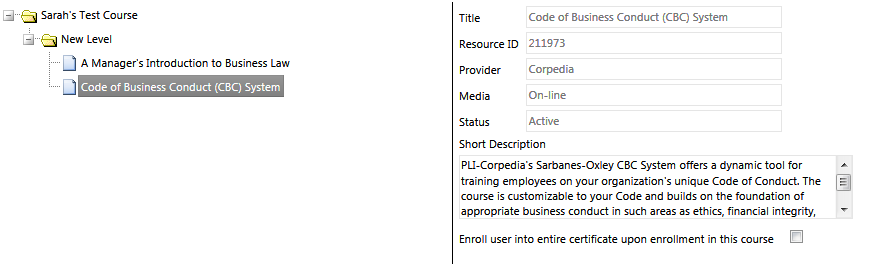
2.Check “Enroll user into entire certificate upon enrollment in this resource.”
Important: When this is checked a learner who enrolls in this resource will have the entire certificate added to their Development Plan. This means the resource can no longer be used outside the certificate.
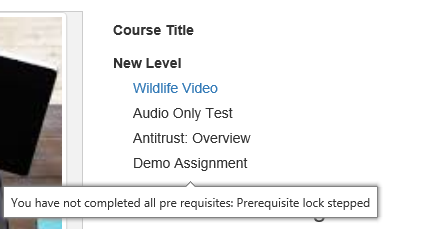
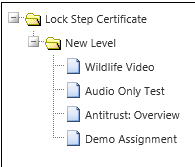
Lock Step Feature
The Lock Step feature allows an administrator to force the learner to complete the courses in the desired order. It essentially makes each resource within the certificate a prerequisite to the next one.
Note: This feature may not be turned on in all systems. Please contact Client Support if you are interested in this feature.
To use the lock step feature:
1.Create the certificate and add the resources in the order in which the learner should complete them. You can drag and drop the resources if needed to place them in the desired order.
2.Save and Close the Administer Curricula pop-up box.
3.On the Overview tab of Maintain Learning Resources, you should now see the Lock Step check box. Check this box to lock down the order in which the resources can be completed.
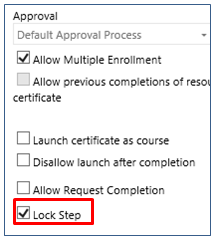
4.When the learner sees the certificate only the first resource will be available to launch.