The Course Wizard is the preferred method for uploading new courses. To access it, go to Resources > Course Import Wizard in the System Administrator menu or click on the Add or Update a New Course icon in the System Administrator home page.
If you have a specific course ID that should be used, be sure that it is set in the properties of the course files. To ensure that the course ID has been set, look at the imsmanifest file for SCORM courses, the course ID should be shown in the identifier element of resource. For AICC courses, look at the Course_ID field in the .crs file.
If the course ID is not initially set as part of this upload, it can always be set through the Maintain Learning Resources screen once the course has been created.
Note: If your course has been translated into multiple languages, only use the Course Wizard to upload the course files for the default language (typically English). The course files for all additional languages must be uploaded through the File Manager in Maintain Learning Resources.
See the help topic Uploading Translated Course Files for step by step instructions on how to do this.
To import course files, open the Import Courses Wizard, and select the option “Load a new course or courses.”
Select the correct type of course file(s):
Click the Upload button on the next page and navigate to the course zip file from your computer.
Note: If you are uploading multiple course files, the package must have each course in its own folder. Then all of the individual folders should be zipped together into one zip file for uploading.
Once all of the files have been uploaded, the LMS will show you which courses were loaded and any errors that were encountered.
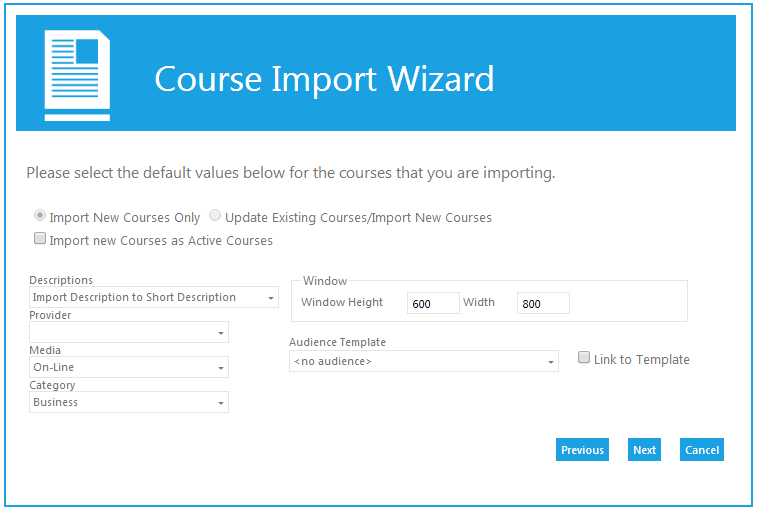
On the next screen, choose your default values:
If all of the uploaded course files are for new courses, keep the default of “Import New Courses only.”
If you are uploading both existing and new courses, be sure that the course number is in the course files of the existing course files. If the LMS does not see an existing course number, it will assume that all of the course files are for new courses and will automatically disable the “Update Existing Courses/ Import New Courses” option.
The uploaded course files should contain the course description. You can import that into the short description field, long description field, or both.
Select a Provider, Media type, and course Category if desired. These can also be set through the Maintain Learning Resources screen once the upload is complete. If you are going to wait to add some settings, you should not import the course as Active.
If you would like to set the Primary audience for this course using an Audience Template, you can select the template here and then check the “Link to Template” box.
The final confirmation page will show you how the courses have imported. If you need to make additional edits to the new course, for example, set the audience, click the Edit Course Details button to go directly to this resource on Maintain Learning Resources and make any necessary changes. Note: The Edit Course Details button will be inactive if multiple course files were loaded.
Importing Non-Standard or Third Party Courses