
Virtual Classroom Providers are services such as WebEx and Adobe Connect, that provide online classroom meeting spaces. To add a new provider, go to Tools > Maintain Virtual Classroom Providers in the Administrative Console.
Any providers who are already in your system will be listed on this page. To edit an existing provider, select them on this list and click the Edit button in the top toolbar. To add another, click New.
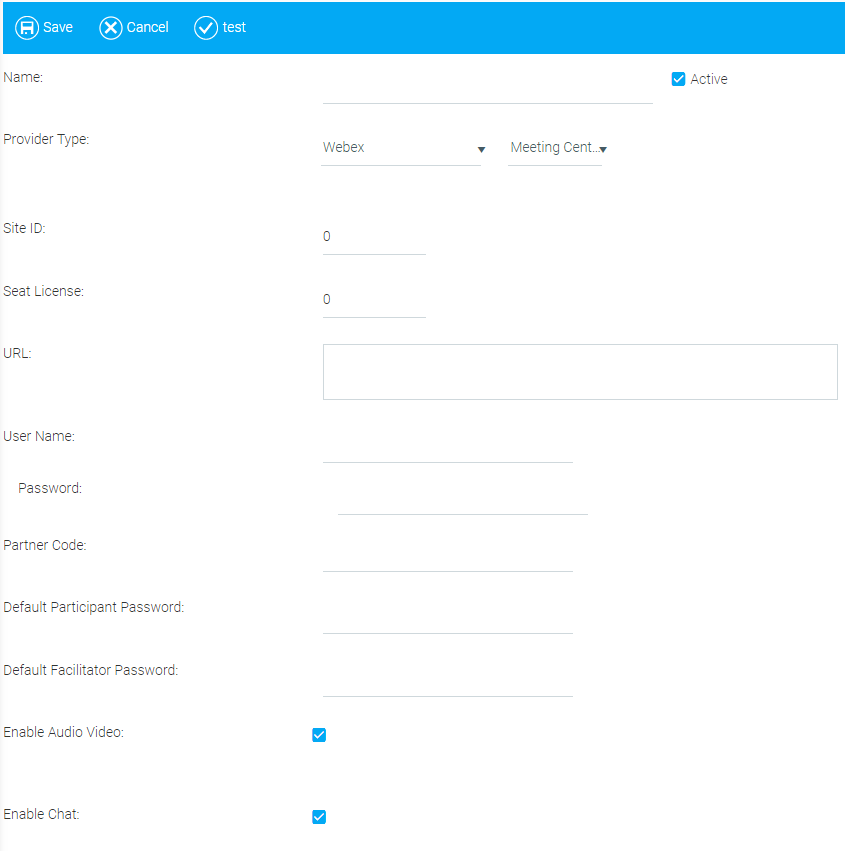

Enter a Name (e.g. Webex-Primary) and the Provider (e.g. WebEx) in the first two fields.
Click the Provider Type drop-down and select the correct provider here also. Note that the screen may change depending on which provider you choose.
See below for the specific information required for different Provider Types.
Beside the Provider Type, you will see a second drop-down menu. Select the type of virtual space desired.
Ensure that Audio Video, Chat, and Polling are all enabled.
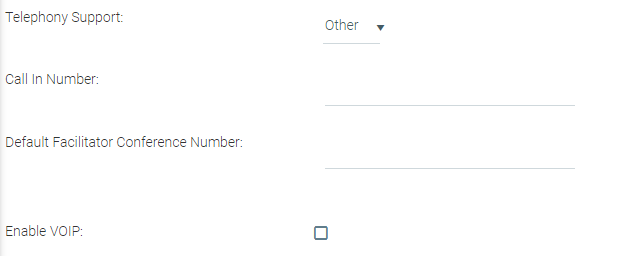
Optionally, you can enter a conference line number for attendees to use to phone in, or enable VOIP for calling in via computer.
Click Save to create the Provider record.
Filling out the fields on the LiveMeeting screen is similar to Webex, except that instead of the Center type drop-down, there is a Conference Center field to fill in.
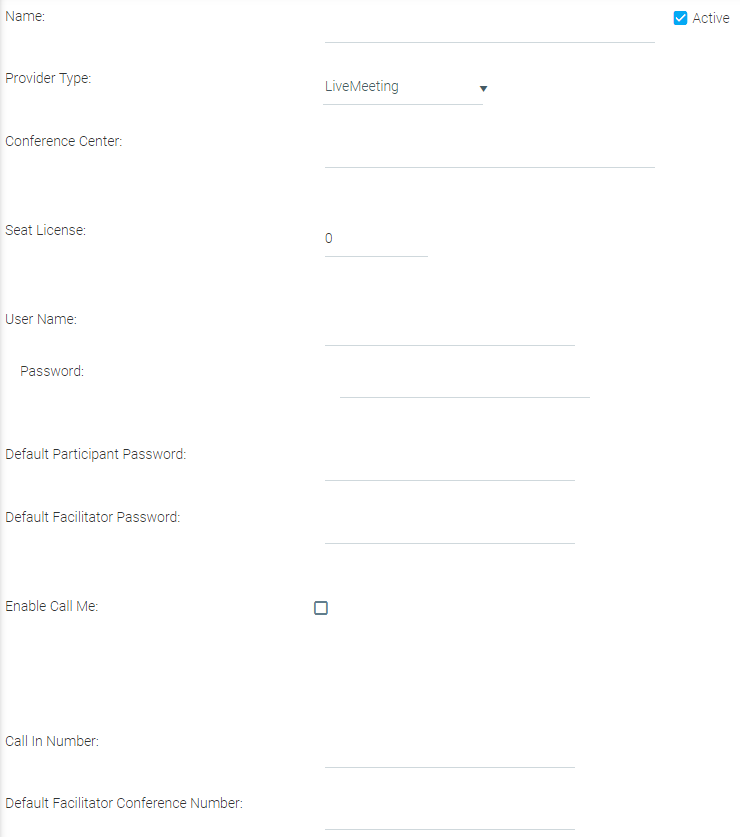
There is no Partner Code required, and also no check boxes for enabling audio/video, chat, or polling. There is, however, an "Enable Call Me" option. The other fields are the same as above. When you are finished filling them in, click Save.
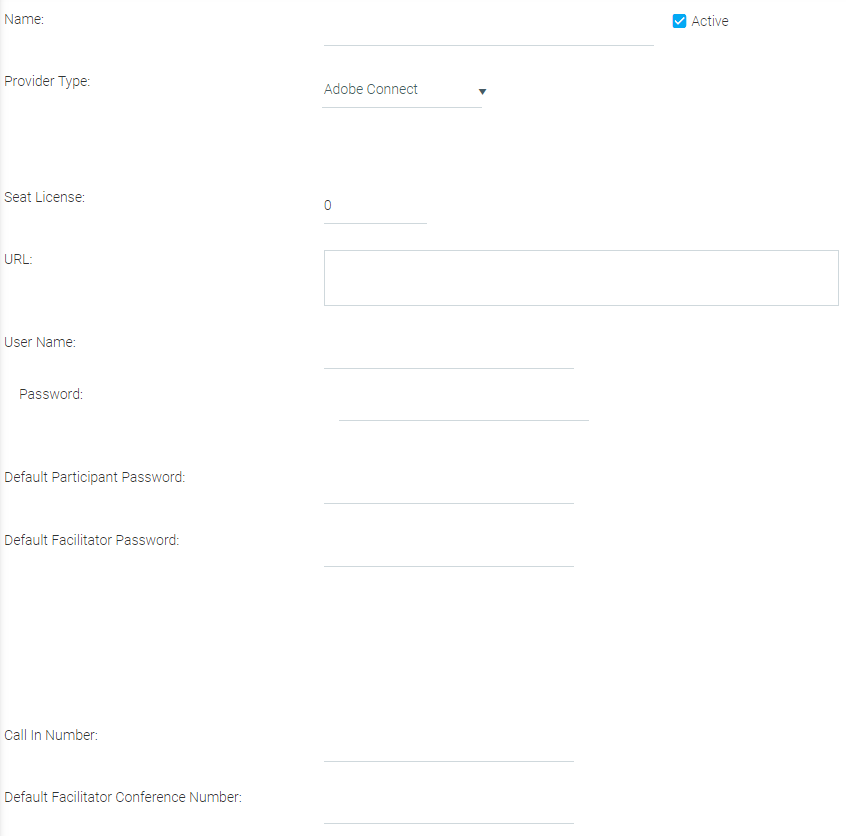
Adobe Connect does not have any field for type of Center. There is no Partner Code required, and also no check boxes for enabling audio/video, chat, or polling. There is also no "Call Me" option to enable. The other fields, however, are the same as above. When you are finished filling them in, click Save.
Select the Generic Virtual Classroom as the Provider Type, and then fill in the required information.
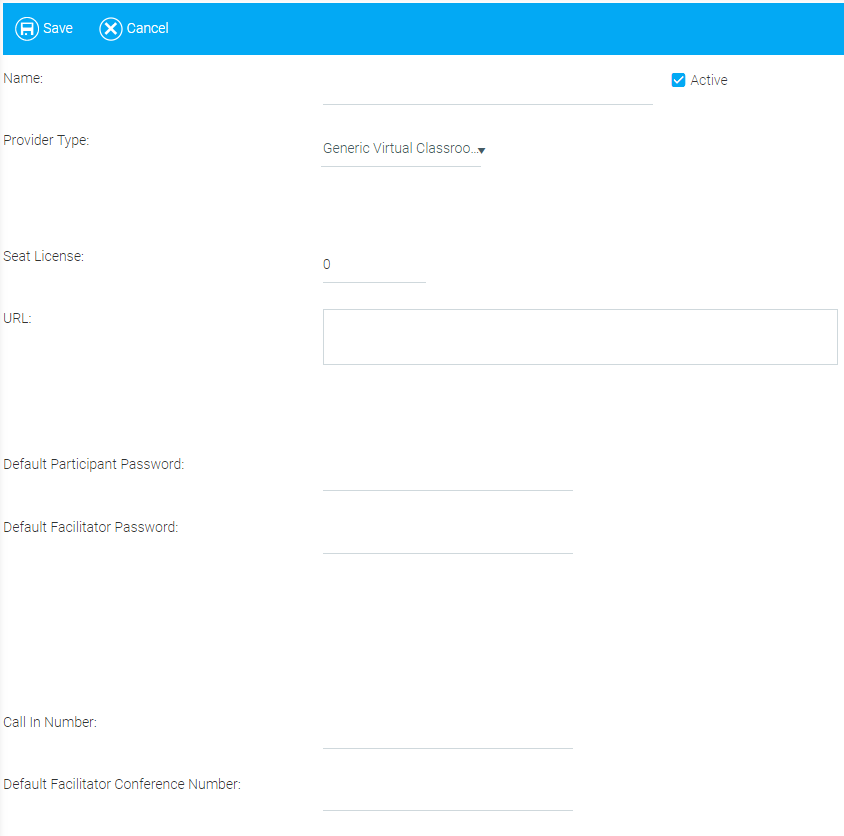
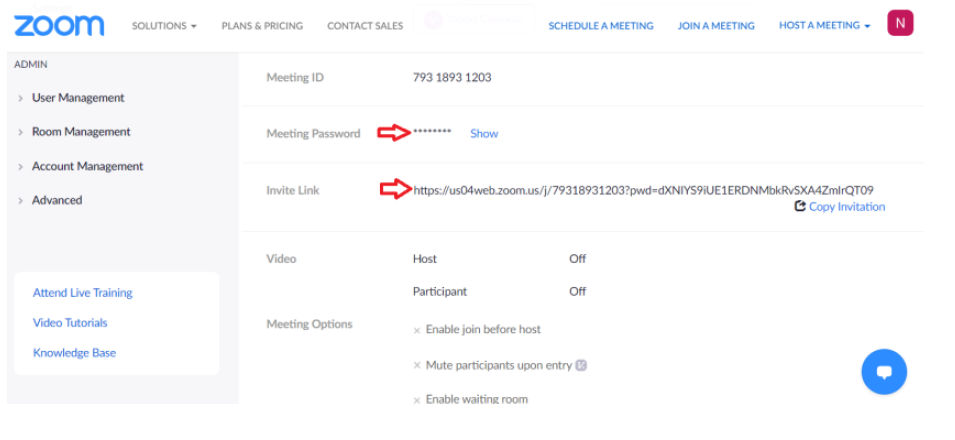
Copy and paste the password and URL for the meeting session that was set up in Zoom or Microsoft Teams in the URL field. See the example below:
Click Save to confirm adding the Provider Type.
To test that set-up is correct, click the Test button in the top toolbar.

If any information is incorrect, the LMS will display an error message. Correct the information and then test again. The system will display a message letting you know that the provider was successfully set up. Make sure you save any corrections.
The following section will describe the setup and integration process for WebEx.
The LMS uses the WebEx URL and XML API methods to send class information to WebEx. Because both methodologies are used, both should be enabled within the WebEx account. The WebEx account should also be configured to enable "single sign on". (This is referred to as "Auto Logon" as well.)
You will need the information listed below from your WebEx administrator. This information will be entered into the Virtual Classroom Provider screens within the LMS.
| Information From WebEx | ..to LMS Field |
|---|---|
|
User Name |
User Name |
|
Password |
Password |
|
Site URL |
URL |
|
Site ID |
Site ID |
|
Partner ID |
Account Number |
|
Maximum number of participants per meeting |
Seat License |
Since multiple WebEx accounts are supported, you can set up separate Provider records for each account and use them for different groups within your organization. If this is the case, you may want to enter something different in the Name field for each Provider record, for example "WebEx - Sales" and WebEx - Support".
When creating or editing an ILT session within the LMS, the WebEx XML API for a meeting is used. This consists of a collection of operations (CreateMeeting, DelMeeting, and SetMeeting.) as described in the XML API documentation version 3.8.3.
The LMS will manage access to the WebEx session via the WebEx URL API.
It is assumed that presenters for a session have WebEx login accounts. A presenter will use the "JoinMeting (JM)" API method. This will start the WebEx session, and allow the presenter control of the meeting. Please note that the presenter must be authenticated by supplying a valid WebEx user name and password prior to joining a meeting.
End users will use the "AttendMeeting (AM)" API method. The process will send the appropriate meeting key, user information and password to the session. Users will not need to have a WebEx account, nor will registered participants show as attendees within WebEx prior to the session.
Note on Multi-day Classes: Webex can support multi-day class sessions; however, each class session must be on a different day. Webex cannot support multi-day classes that contain two sessions on the same day.