Setting Up a Certificate

  1. From the Administrator's Home, open the Navigation Bar on the left of the screen.  Click Resources, then select Maintain Learning Resources.


  2. Click New in the top Tool Bar.


  3. The following screen will appear with the Overview tab displayed.  Select Training Plan / Certificate Program from the Type of Resource drop-down.


  4. Assign a Title to the course by populating the Title field.  The Short Description field is optional, but can be helpful in ensuring that users understand the purpose of the training.


  5. Use the Resource Status drop-down to indicate the status of the course (e.g., Active, Inactive, or Retired).  Users will only be able to access the course if the Resource Status is set to Active.


  6. Select Certificate from the Media drop-down.


  7. Select the Provider of the content from the Provider drop-down.


  8. Optional:  Check the Allow Multiple Enrollment box to allow users to enroll in the certificate more than once.  This is helpful if users are going to be required to retake the certificate to remain in compliance.
     
  9. Optional:  Check the Allow previous completions of resources to be included within this certificate box if you want to allow users' previous completions of courses within the certificate to count towards the completion of this certificate.
  10. Optional:  Check the Launch Certificate as Course box if you want the certificate player to immediately launch the first course in the certificate once a user selects it.  
     
  11. Optional:  Check the Lock Step box to have users complete the certificate's courses in the order in which they are listed.  
     
    Note

    This feature may not be turned on in all systems. Please contact Client Support if you are interested in this feature.

  12. Under the Description tab, enter the Long Description of the certificate.  You may copy the information from the Short Description field on the Overview tab if necessary. 


  13. Under the Objectives tab, enter the Learning Objective(s) for the certificate, if applicable.


  14. Navigate to the Details tab.  Check the course's category in the Primary Categories field.
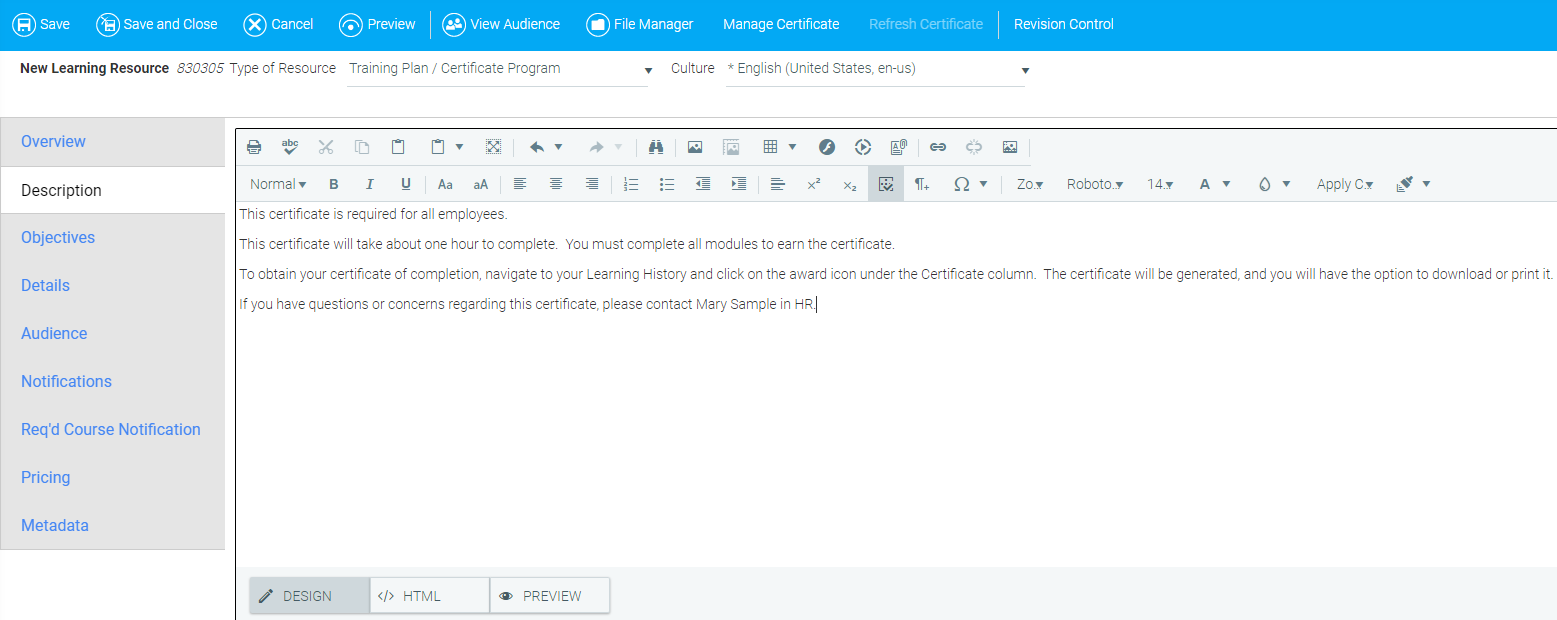
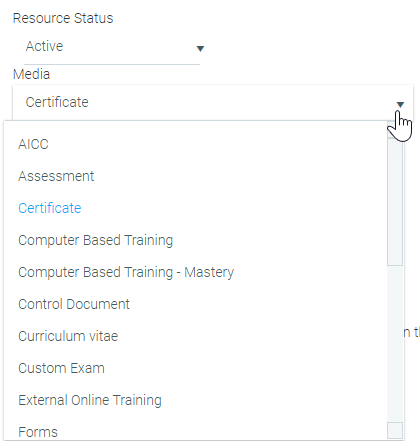
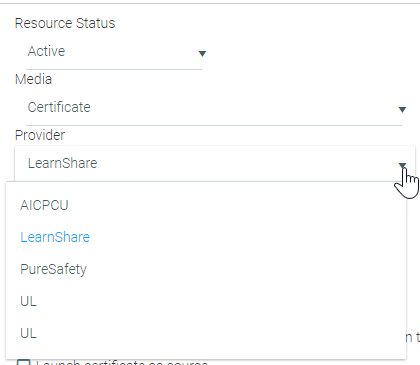
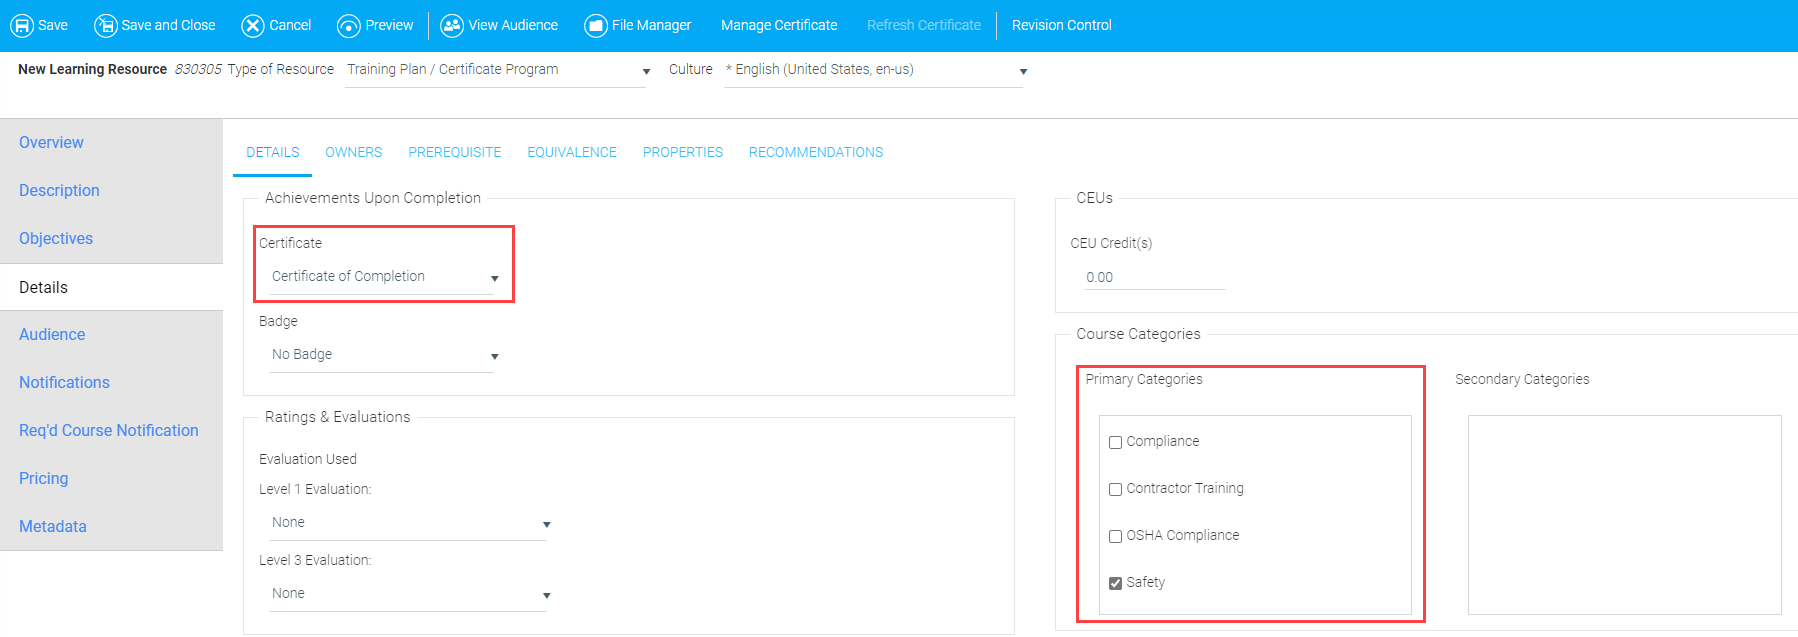
    Optional:  As part of our best practices, you may issue users a certificate of completion by selecting one of the options available from the Certificate drop-down menu.  


  15. Navigate to the Owners sub-tab.  Populate the Course Owner field under the Person column.  You must also populate the Instructional Designer and/or Content Owner fields under the Person column.  While both are not required, one must be present


  16. Optional:  Enter prerequisites for the certificate under the Prerequisite sub-tab, if applicable.
     
  17. Click the Audience tab.  To set up the certificate's audience, follow the instructions provided in About Audience Mapping and the topics that follow.  Best practice is to leave the selections under the Primary tab unmodified.

     
  18. Click the Notifications tab.  Check the Enable box to enable notifications.  Enter the certificate title in the Subject field.
     
    Note

    Some organizations have notifications for required resources enabled by default.  If this describes your organization, please disregard this step.


  19. If the certificate is going to be required, follow the instructions in this Step.  If the certificate is NOT going to be required, skip to Step 20.
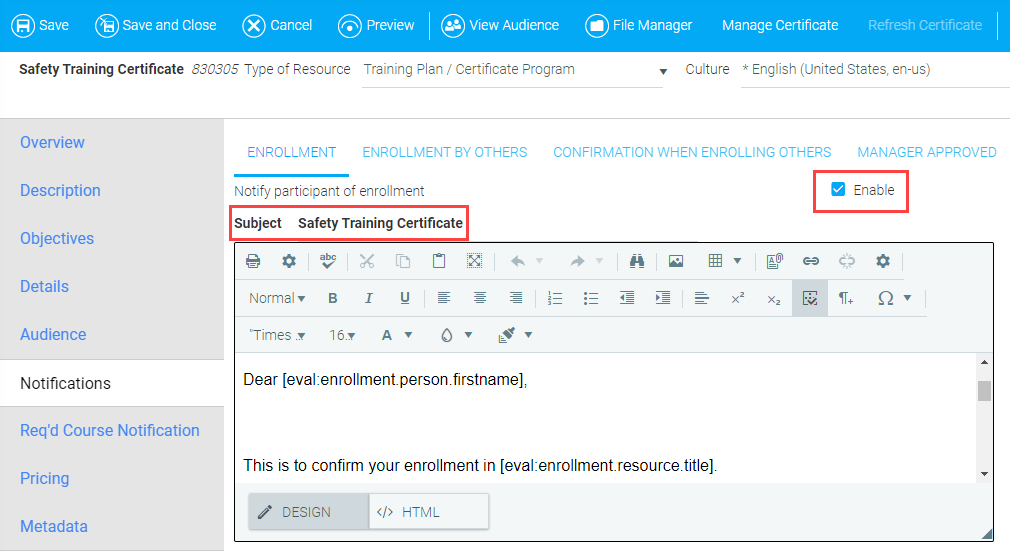
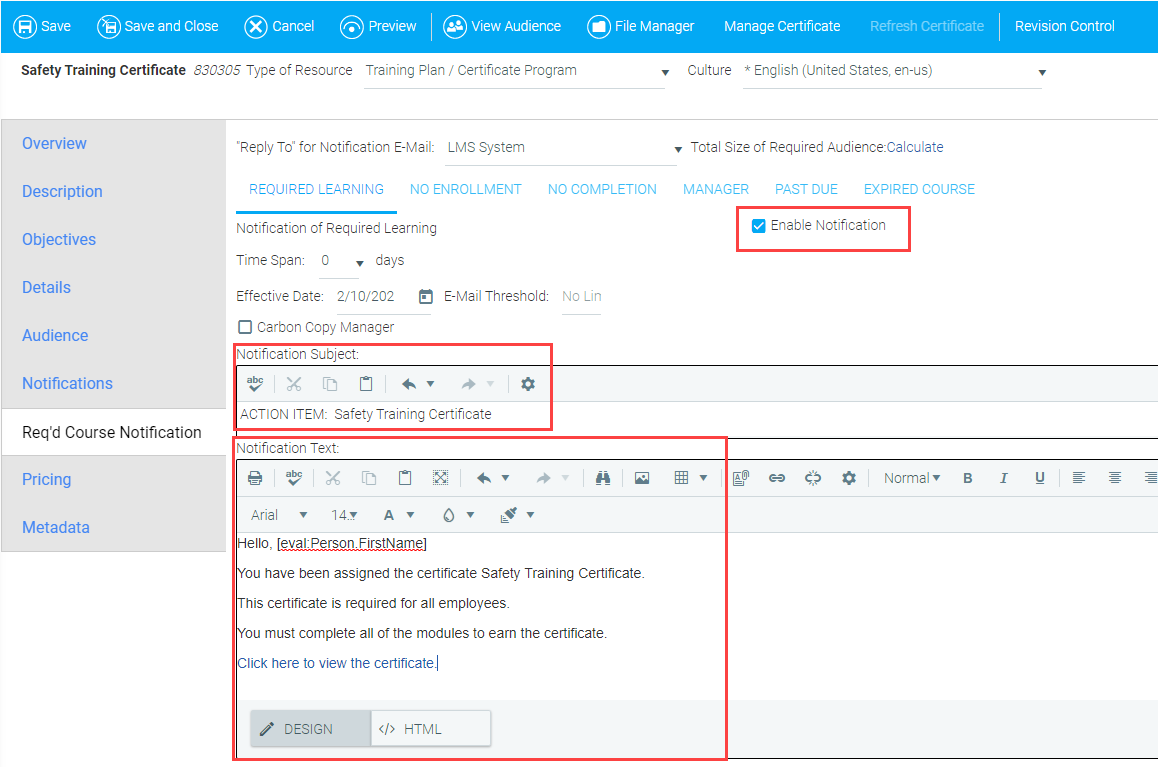
    a.  Click the Req'd Course Notification tab.  Check the Enable Notification box.
    b.  Enter the subject in the Notification Subject field (e.g., "ACTION ITEM: ").
    c.  Enter the message that will be sent to the audience in the Notification Text field.


    d.  Optional:  If desired, click the Past Due sub-tab and check the Enable Notification box to send a notification to the audience when the certificate is past due.  Select the number of days after the due date when a user will receive a Past Due Notification from the Days drop-down menu.  Use the Subsequent Reminders field drop-down menu to select the number of days that must pass before a user will receive an additional notification.  Check the Carbon Copy Manager box if you wish to copy the user's manager on these notifications.  Lastly, populate the Notification Subject and Notification Text fields.


  20. Click the Save button in the top Tool Bar to save your selections. 
     
  21. Next, you will need to add courses to your certificate.  See Adding Courses to a Certificate to learn how to
    accomplish this.
     
  22. After you have added courses to the certificate, remember to add the certificate to the Course Catalog.  See Adding a Course to the Course Catalog for instructions.

For a brief video on this topic, please see Setting Up a Certificate.

Related Links

Create or Edit a Learning Resource

Create a Document Resource

Overview - Managing Certificates

The Overview Tab

The Description Tab

The Details Tab

The Metadata Tab

Optional Information for Certificates

Adding Courses to a Certificate

Adding a Course to the Course Catalog